
60 Inch Built-In Refrigerator - How to Guide
As mentioned in our post "7 reasons to install a refrigerator trim kit in your kitchen", reason number 4 was "Build a commercial size refrigerator with more volume and for less money". Today we will be diving into this topic by discussing how to build and install 60 inch built-in refrigerator in your kitchen.
Large refrigerator freezer combo units are common in high-end homes. Families love the extra refrigerator and freezer space provided by these large built-in appliances. With our custom kits, it’s easy to create your own refrigerator freezer combo – often for less money, better reliability, and more flexibility when in comes time for replacement in the future.
Quick Links
60" Built-in options - DIY vs. standard
How to build the refrigerator cabinet
60" Built-in Refrigerator options - DIY vs. Standard
When it comes to 60" refrigerators, there are two categories - Do-it-yourself or OEM (Original Equipment Manufacture). Below is a chart illustrating the difference between the two.

Refrigerator selection
The first step if you choose to assemble your own 60" built-in refrigerator is to select a refrigerator. Below are several makes and models to consider.
- Fisher & Paykel RF170WDXX5
- Bertazzoni REF31BMFXL
- Hisense HRB171N6ASE
- GE GBE17HYRFS
- Forte F19BFRES450SS
- Liebherr CS 1400
- Beko BFBF3018SS
- Forno Milano FFFFD1786-31S (with ice maker) and FFFFD1785-31S (no ice maker)
Trim Kit options
Once you've selected which refrigerators you'd like to use, the next step is to decide on a trim kit. Below are a few of the options to consider.
Finish: In an effort to match all refrigerator makes and models, we offer 4 different finishes - brushed stainless steel, white, black, and black stainless. Free samples can be ordered here. Alternatively, you can reach out to us and we may have photos and a recommended finish for certain makes and models we've seen. Lastly, if you choose to use a refrigerator which is stainless, e.g. graphite, white, or black, then please contact us and we may be able to provide these colors.
Style: We offer a louvered grille and flat grille for the upper portion of the trim kit. The louvered grille has approximately one louver per inch of height.
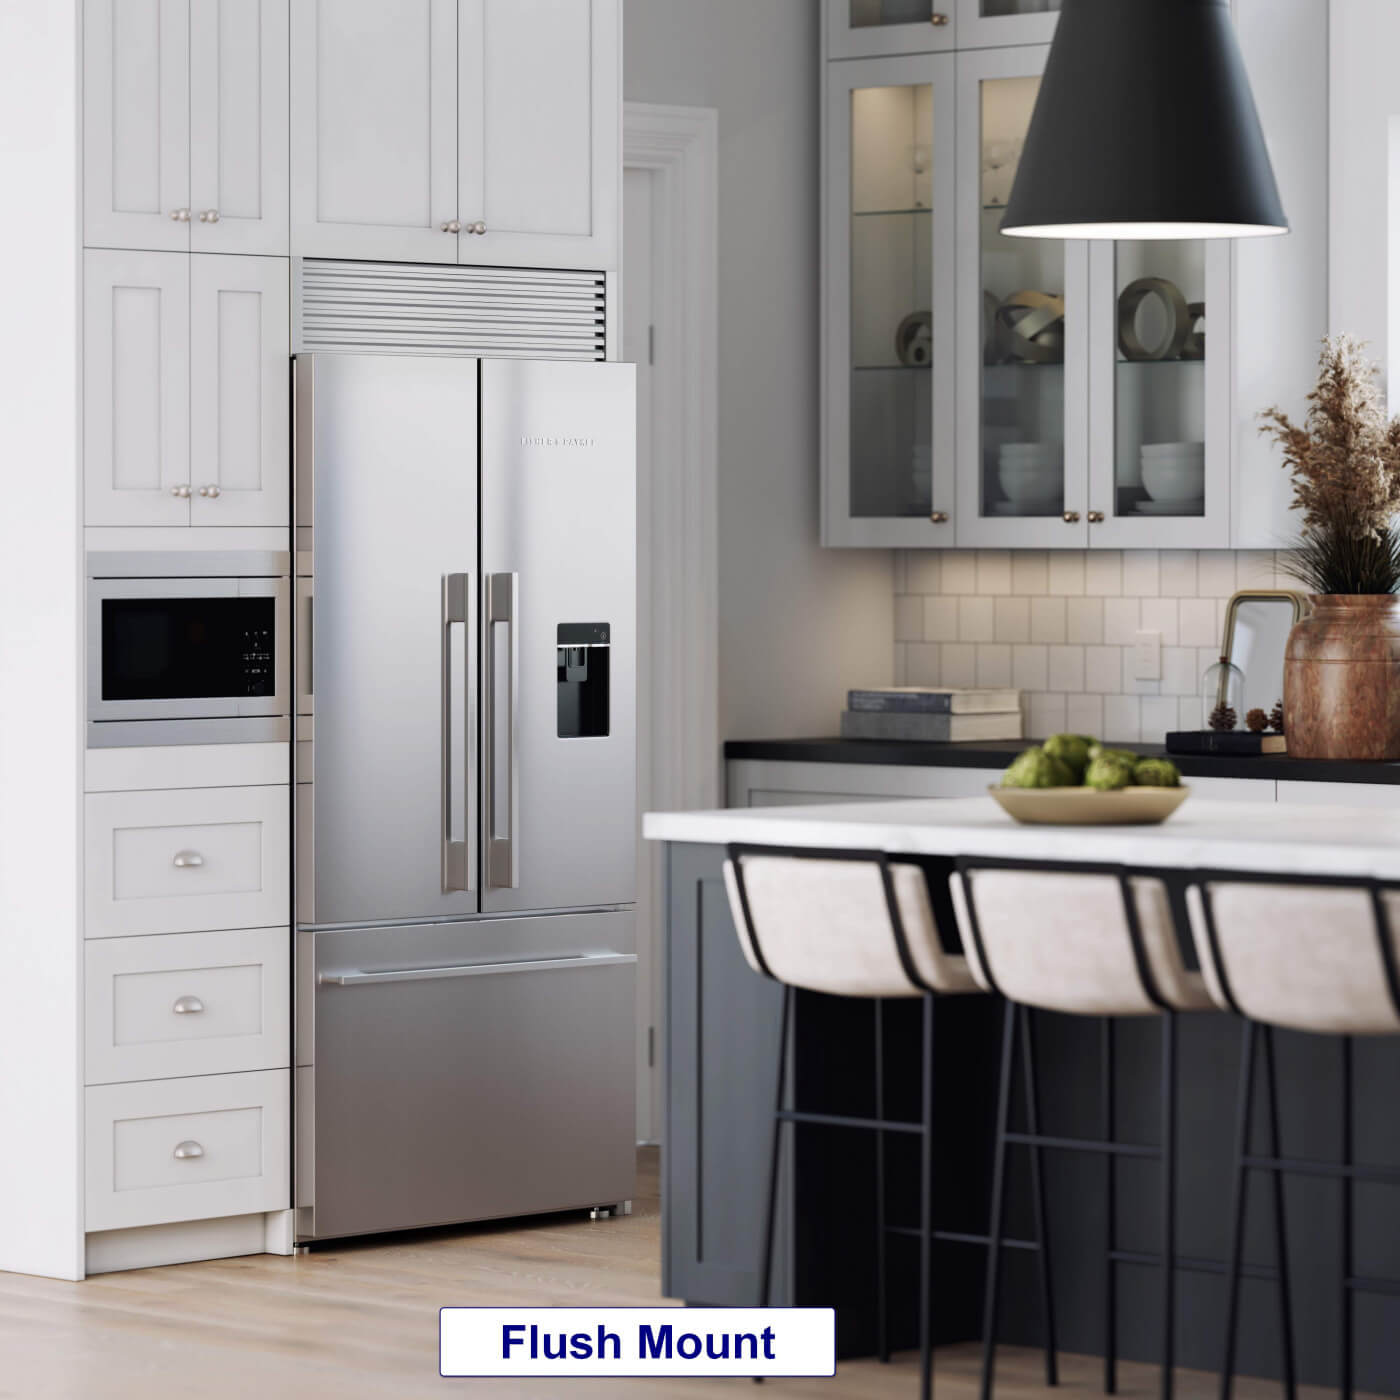
Mounting position: We offer two mounting options - flush mount and proud mount. Below are photos of both options. As you can see, our flush mount sits almost flush with the face of the cabinets. Our proud mount comes with slotted brackets so the top grille can slide out and be mounted flush with the front of the refrigerator.

Joiner or no joiner piece: Many OEM refrigerator freezer combo sets come with a joiner piece which hides the gap between the two units. It is usually held in place by a magnet or adhesive. We offer a similar piece which is shaped like an "L" and adheres to one of the refrigerators. When the units are slid together, the joiner piece makes it look like the two units are connected. We've had many customers install their DIY built-in refrigerators without a joiner so this option is completely up to you.
How to build the refrigerator cabinet
Once you've selected your refrigerators and trim kit options, you will next need to build your cabinets. Alternatively, if you have existing cabinets we can also make a trim kit to fit them. You will just need to shop "kits for existing cabinets" rather than "kits for new cabinets". If in doubt, you can always contact us with questions and we are happy to help.
Assuming new cabinets are part of your project, you will need to know the dimensions for the opening. For this, we have spec sheets for each trim kit option which can be found here. Alternatively we can also are able to provide a blueprint if you contact us with your information.
Putting it all together
Once the cabinets are built and the trim kit installed, the final step is to slide the refrigerators into place and level them. Once this step is completed, your project is complete and you can enjoy your new 60" built-in refrigerator.

Fisher & Paykel 60" built in refrigerator | Louvered grille | Flush mount | Bright finish

Hisense 60 inch built in refrigerator | Louvered grille | Proud mount | Matte finish

Bertazzoni 60 inch built in refrigerator | Flat grille | Proud mount | Bright finish
Conclusion
I hope you’ve enjoyed learning how to build your own 60" built-in refrigerator. If you want to learn more about our trim kits or get help with your project, we are always here and ready to help.
FAQs
How can I achieve a 60-inch built-in refrigerator setup without the high cost of a true built-in?
You can create a 60-inch built-in setup by placing two standard 30-inch freestanding refrigerators side by side. Pairing these appliances with a custom Double Refrigerator Trim Kit fills the gaps around the top, bottom, and sides of the units, giving you a fully integrated look for a fraction of the cost of a luxury built-in.
How do I handle the empty space between the two side-by-side refrigerators?
We offer a custom stainless steel center joiner piece that is installed directly between the units. The joiner is an L-shaped strip that attaches to the side case of one refrigerator using adhesive. It's available in 3/4-inch, 1-1/2-inch, and 2-1/4-inch widths, providing room for proper ventilation while improving access to the inner door handles.
How deep should I build my custom cabinet surround to ensure the refrigerators look built-in?
Your cabinet depth needs to be greater than the depth of the refrigerators so the painted cases are hidden. For new cabinet construction, we recommend a minimum cabinet depth of 26 inches for counter-depth refrigerators, and a minimum of 32 inches for regular-depth models.
Should I choose a flush mount or proud mount top grille for my side-by-side setup?
A proud mount top grille is recommended for the most integrated look — its slotted brackets allow the grille to extend outward to sit flush with the front of the refrigerator doors. However, a flush mount is the better choice if your refrigerator doors protrude more than 4-7/8 inches past the cabinets, or if the refrigerators have exposed top hinges that the grille needs to sit above or be notched around.
Will the trim kit still work if my cabinets or the two refrigerators are slightly out of square?
Yes. The side trim pieces overlap the front face of your cabinet. This overlap provides flexibility during installation, allowing you to position the trim where it needs to go to account for minor misalignments or slightly out-of-square cabinets.