
How to Install a Microwave Trim Kit: DIY Guide for a Built-In Look
Table of Contents
Installing a microwave trim kit can seem daunting, but with the right steps and guidance, it can be a straightforward process. In this blog post, we will cover the essential steps for how to install a microwave trim kit, ensuring that your microwave fits perfectly within your cabinetry. This guide is designed to complement the specific installation videos that come with your trim kit, providing a basic understanding of the components and steps involved.
Introduction to Microwave Trim Kits
A microwave trim kit is a frame that surrounds your microwave, giving it a built-in look while ensuring it fits snugly within your cabinetry. Each kit is custom-made based on the dimensions of your microwave and the specifications of your cabinets. It's important to follow the detailed instructions and videos provided with your kit for the best results.
Step 1: Gather Your Tools and Components
Before you begin, make sure your kit came with all the necessary components and gather the necessary tools. Typically, your kit will include:
- Custom sheet metal rails
- Stabilizer (varies by model)
- Metal brackets
- Screws
For tools, you will need
- Tape Measure
- Screwdriver
Step 2: Install the Sheet Metal Rails
The first step in the installation process is to install the sheet metal rails. These rails are custom-made based on the height of your cabinet and your microwave model. They are shaped like an upside-down "U" and equipped with discs to hold them in place.
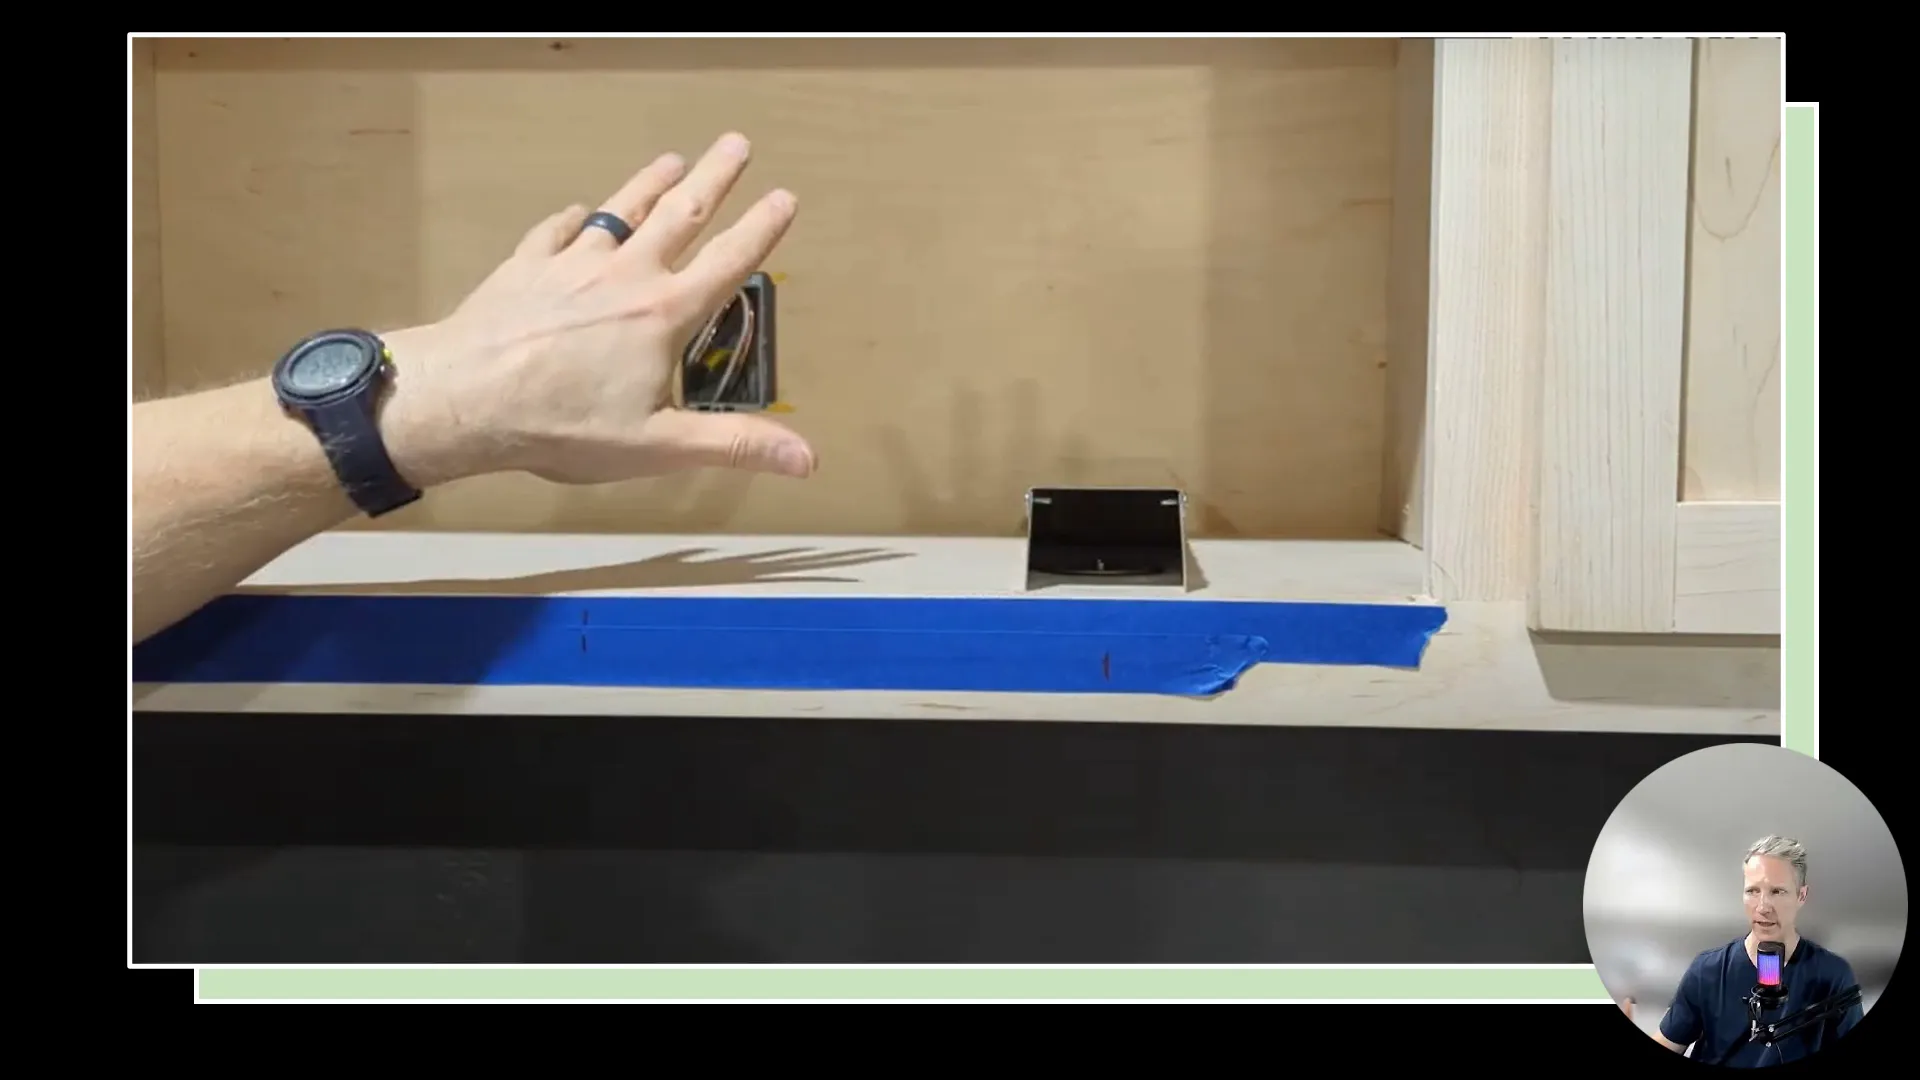
Ensure that the rails are positioned so the microwave sits in the center (horizontal) position. In our detailed installation video, we show you some easy ways to do this. This is crucial because the microwave will rest on these rails, centering it in the opening.
Step 3: Install the Stabilizer
Next, install the stabilizer, which helps keep the microwave from shifting while in use. There are typically two versions of this stabilizer:
- Slotted version: Allows for adjustment and is installed at the back of the microwave.
- Fixed version: A more straightforward installation without adjustable slots.
For the slotted version, position it so the back of the microwave rests against the flat piece of sheet metal, preventing it from moving backward.
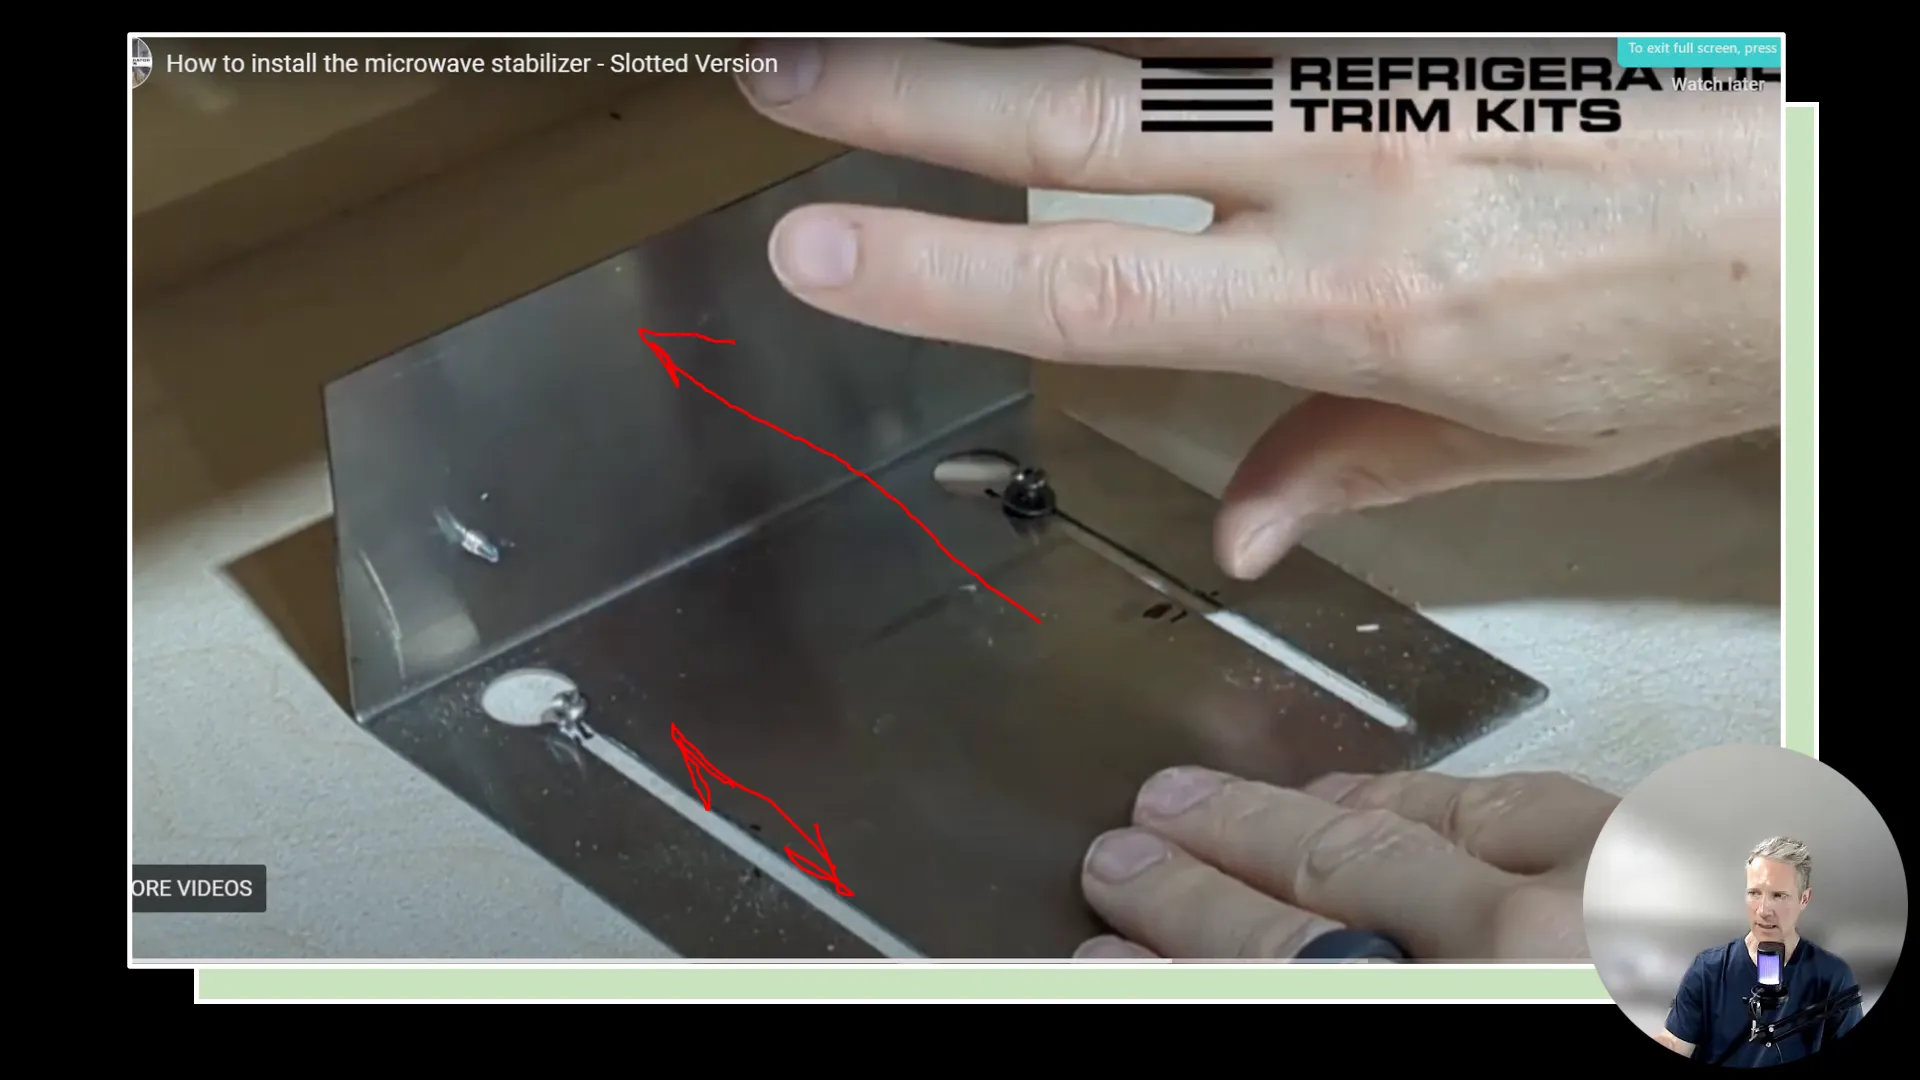
Ensure that the stabilizer is securely fastened and that the microwave fits snugly against it.
Step 4: Install the Face Frame
Once the rails and stabilizer are in place, it's time to install the face frame. This frame covers the installation hardware and gives the microwave a clean, finished look. You will need four metal brackets for this step, one in each corner of the frame.
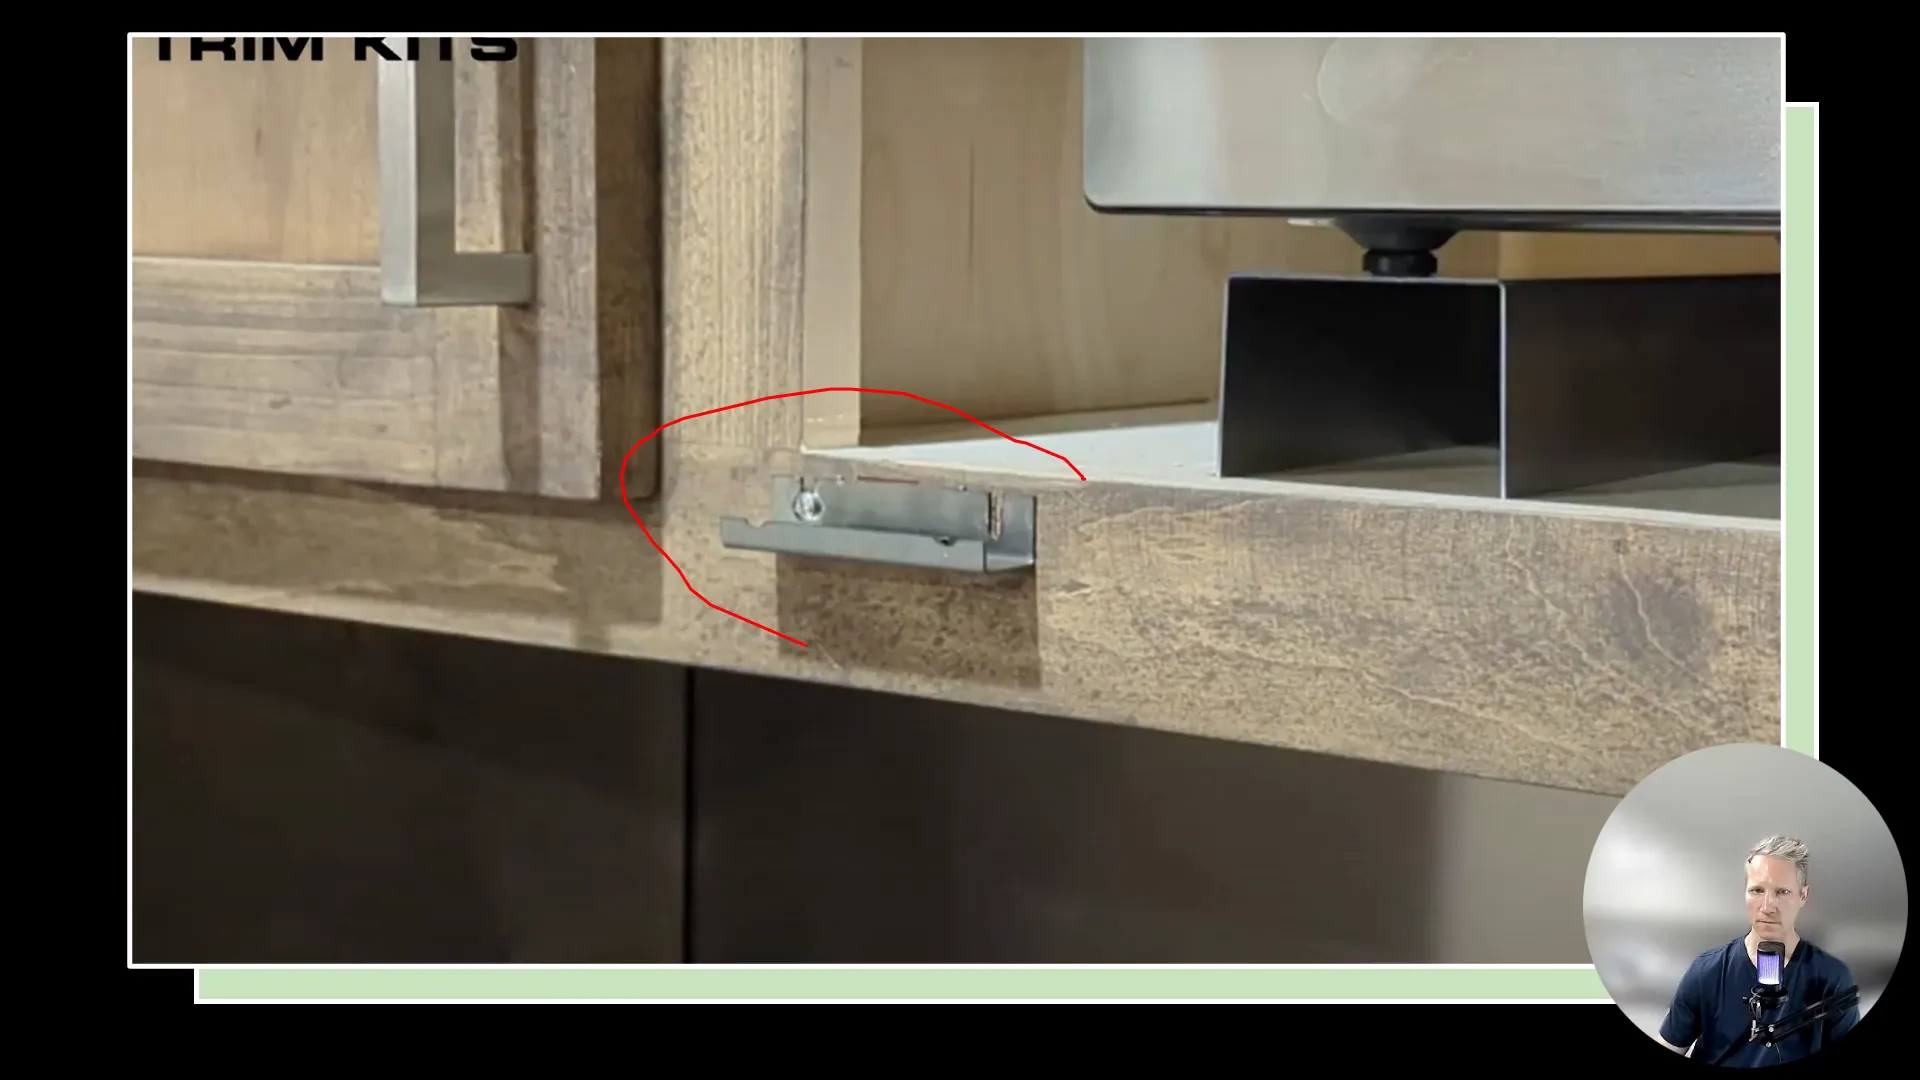
These brackets have built-in magnets that hold the face frame in place. Position each bracket firmly in its place, ensuring they are evenly spaced.
Step 5: Adjust the Face Frame
After installing the face frame, check for any gaps between the frame and the cabinetry. If necessary, you can adjust the height of the frame by loosening the screws on the brackets and moving them slightly up or down.

This adjustment is important to achieve a seamless look and ensure the frame aligns perfectly with your cabinets.
Final Touches
After everything is in place, take a step back and assess the installation. Ensure that the microwave is securely held in place and that the face frame looks even. Clean off any smudges or fingerprints from the installation process to reveal a beautiful, polished look.
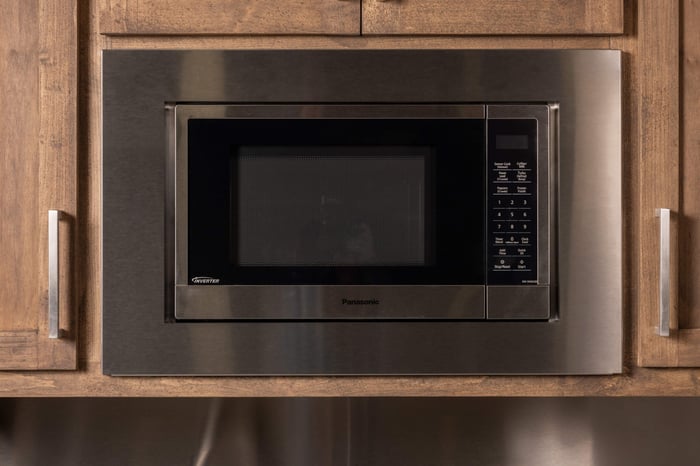
Your microwave should now look like it was built into your kitchen cabinetry, enhancing the overall aesthetic of your space. If you plan on installing a refrigerator trim kit while you're at it, here's a great resource for that: Refrigerator Cabinet Surround
FAQs
Do I need to remove the existing metal base or rails from my old microwave before installing the new trim kit?
Yes. You need to remove any existing metal bases, rails, or pans left behind by your old appliance. Our custom trim kits include a new set of metal U-shaped risers designed to elevate, center, and secure your new microwave within the opening. For these risers to work safely and accurately, they need to sit flat on the bare cabinet shelf.
How does the stainless steel face frame attach to my cabinet, and will the screws be visible?
The face frame attaches using a hidden magnetic mounting system — no visible screws on the exterior. During installation, you'll screw four magnetic corner brackets directly into the face of your cabinet, and the custom stainless steel frame simply snaps onto those magnets.
How do I ensure my microwave door doesn't hit or rub against the metal trim when I open it?
The microwave needs to be pulled slightly forward on its risers so that the front of the appliance sits flush with the face of the trim kit. Additionally, the kit's inner opening is manufactured to leave a functional clearance gap around the unit so the door and hinges can operate freely without interference.
Will a standard countertop microwave slide backward into the cabinet when I press the buttons or shut the door?
No. The metal risers included with every custom kit are designed to hold the appliance securely in place. Once the microwave is properly positioned on the risers, it won't shift, wiggle, or slide backward into the cabinet cavity during everyday use.
Is the installation process different if I am using a drawer-style microwave?
Yes. While our custom trim kits are fully compatible with drawer microwaves, the installation requires a bit more preparation. Because drawer microwaves slide out rather than swing open, you'll typically need to make some minor wood modifications to your cabinet to accommodate the hardware. We provide a specific step-by-step video guide walking you through what this involves before you begin.
Conclusion
If you Install a microwave trim kit, it can greatly enhance the look of your kitchen. By following these steps and referring to the specific videos provided with your kit, you can achieve a professional-looking installation. If you have any questions or need further assistance, feel free to reach out for help. You can reach us online here. Happy installing!