
How to make any refrigerator look built in
When considering ways to upgrade your kitchen and add value to your home, one quick and simple project to consider is converting your regular freestanding refrigerator into a high end built in refrigerator. Whether you have an existing cabinets or are building new ones, this upgrade only takes about 15 minutes and a few basic tools. In this post we will show you how to make any refrigerator look built in.

Quick Links:
1. What is a built-in refrigerator
2. How to make a refrigerator look built in if you already have cabinets
3. How t make a refrigerator look built in if you are building new cabinets
What is a built in refrigerator?
There are three basic refrigerator styles: freestanding, built-in, and integrated. See the chart below for more information.

(click to enlarge)
How to make any refrigerator look built in if you already have cabinets
Step 1: Decide which finish matches your refrigerator
The finish you choose sets the tone for a seamless, built in appearance. We offer 4 different finishes - brushed stainless steel, white, black, and black stainless. Browse our customer gallery for inspiration, or order samples to see how each finish complements your refrigerator in person. If you’re unsure, we are here to guide you with recommendations based on your model and style preferences.
Step 2: Flush or proud mount
There are two mounting styles for the top grille: flush or proud. Below are photos and an explanation of both. There are two things worth noting for the proud mount: 1) The front of the grille can extend up to 4-5/8"from the front of the cabinet and 2) it requires a gap height of at least 2-1/2" for our proud mount brackets to fit.

Step 3: Top trim kit only or a full kit
Each cabinet configuration is unique, so your decision will depend on the size of each gap. Homeowners who have a narrow refrigerator cabinet will likely have smaller side gaps and may be able to achieve a built-in look by only adding a top trim piece. If you'd like to learn more about the size of gap you can check out our more detailed blog post "Refrigerator gap filler: How to fill the gaps around your refrigerator".

Step 4: Measure for your kit
Measuring for your kit only takes a few minutes. Accurate measurements are essential to achieve a perfect fit and a built-in look for your refrigerator.
Step 5: Install your kit
Installation typically takes about 15 minutes and a screwdriver. Each kit is accompanied by a detailed instruction video. After your refrigerator is rolled out of the opening, simply fasten the pre-cut pieces to the interior of your cabinet using the included hardware and fasteners (2 to 8 screws typically). Once the pieces are installed, roll the refrigerator back into place and that's it.
How to make any refrigerator look built in if you are building new cabinets
Step 1: Decide the finish
We offer 4 different finishes - brushed stainless steel, white, black, and black stainless. Samples can be ordered here. Alternatively, you can view the customer gallery and see which finish might match your make and model. Lastly, you can reach out for an opinion. Many times we have enough data and/or photos to confidently recommend which finish would work best.
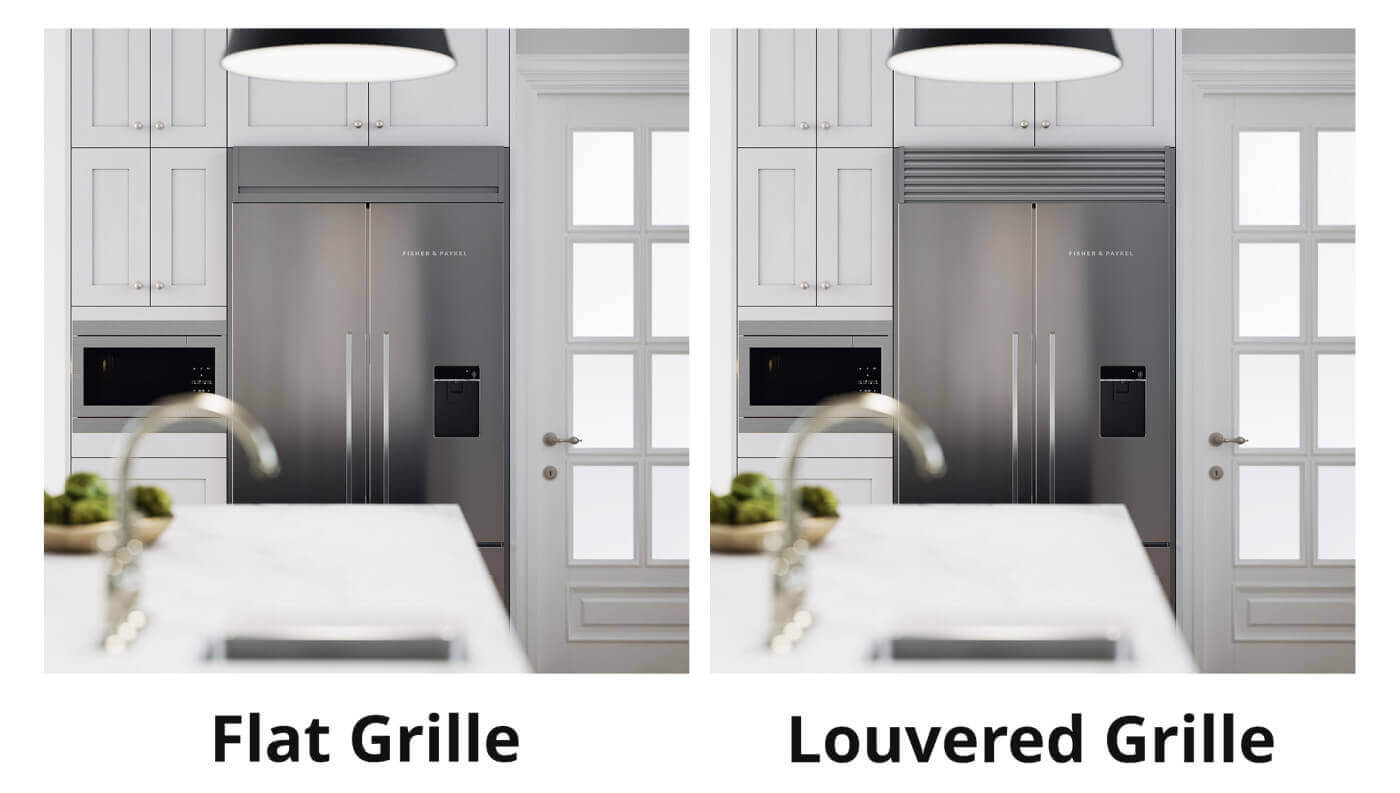
Step 2: Louvered or flat grille
When designing new cabinets, you can choose between two grill styles: flat or louvered. Below, you'll find a photo showcasing both options for easy comparison.
Step 3: Flush or proud mount
There are two mounting styles for the top grille: flush or proud. The photo below illustrates both styles. The grille includes slotted brackets and can extend to 4-5/8" from the cabinet front.
Step 4: Build cabinets
After selecting your options, you can use the spec sheet provided (click to view spec sheets), or a blueprint can be sent upon request. Select the "Send me a blueprint" option to receive a blueprint with your order. If you'd prefer one before ordering, feel free to contact us.
Step 5: Install kit
The final step in "How to make any refrigerator look built in" is installation. Installation typically takes about 15 minutes and a screwdriver. Each kit is accompanied by a detailed instruction video. Before installing the refrigerator into your new cabinets, simply fasten the pre-cut trim pieces to the interior of your cabinet using the included hardware and fasteners (2 to 8 screws typically). Once the pieces are installed, roll your refrigerator into place and you're all set.
We hope this post have been helpful. If you have any questions or need help converting your freestanding refrigerator into a built in refrigerator, we are here for you. We can be reached by email at support@refrigeratortrimkits.com or by phone at 918-212-5988.
FAQs
How can I make my standard freestanding refrigerator look like an expensive built-in unit?
You can transform a standard freestanding refrigerator by installing a custom stainless steel trim kit to fill the gaps around the appliance. For existing cabinets, you can order a kit that includes a ventilated top grille and side trim pieces. The side trim is designed to overlap your cabinet face, attaching with high-adhesion VHB tape for a clean, integrated finish without complex cabinet modifications.
My freestanding refrigerator sticks out past the cabinets. How do I hide the exposed painted sides?
Standard-depth refrigerators often extend beyond the cabinet enclosure, leaving the painted sides visible. If the painted case protrudes by more than 3/4-inch, you can install custom stainless steel side panels. These panels adhere directly to the refrigerator's case, hiding the exposed sides and making them look like a continuation of your stainless steel doors.
Should I choose a flush mount or proud mount top grille for the best built-in appearance?
A proud mount generally provides the most integrated look because its slotted brackets allow the top grille to extend outward so it sits even with the face of the refrigerator doors. However, if your refrigerator protrudes more than 4-7/8 inches from the cabinet, a flush mount is recommended. Stretching a proud mount too far creates a busy appearance with three different surface depths, whereas a flush mount keeps the design clean and nested.
What if my enclosure leaves a large empty space above the refrigerator?
If you have a large void above your refrigerator, choose a top grille and customize it to extend above the cabinet opening. Unlike a proud mount, which has to stay within the core opening, an extended flush mount grille can sit close to your upper cabinet doors, hiding the empty void while adding vertical height.
Can I add a grille to the bottom of my refrigerator to complete the look?
Yes. You can add a custom stainless steel bottom toe-kick grille to replace the plastic grille that came with your refrigerator. Because many freestanding refrigerators have minimal clearance near the floor, many of our customers build a sturdy wooden platform (such as stacked 2x6 boards) to elevate the appliance by a few inches. Elevating the unit adds height and creates the space needed to snap the magnetic bottom grille into place.